 How Does Virginia Parking Lot Striping Improve Traffic Flow?
Safe driving features on cars make life easier for drivers today. But, backup cameras and blind spot warnings can only go so far. Some safety features even use the lines on the pavement to let drivers know when they’ve veered off course. Exploring how Virginia parking lot striping improves traffic flow on your property can help you decide if you need to make changes during your next restriping project.
How Does Parking Lot Striping Help You Maximize Space?
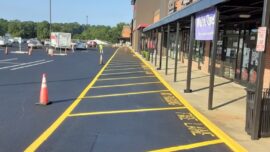
Parking lot striping companies have several ways to help reduce crowding on your property. For instance, we can create 90-degree angles when we are striping parking lots to make more room for two-way traffic. Alternatively, parking lot striping companies often find that angled stalls are best for reducing accidents in one-way lanes.
Are Pedestrian Walking Paths Important to Include In Striping Plans?
With Richmond Virginia lot striping, it’s important to carefully plan for walking paths. Crosswalks are commonly included in our plans for parking lot painting. On top of creating a crosswalk between the front doors of your property and the stalls, you might also want to define other walking paths when we plan Richmond parking lot striping.
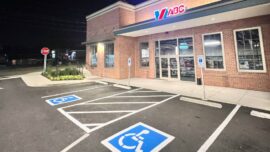
Can You Use Lot Striping to Highlight Special Areas?
Richmond Virginia parking lot painting needs to have certain features in place for meeting local codes and federal regulations. We follow the ADA regulations when we do parking lot painting which includes highlighting accessible spaces.
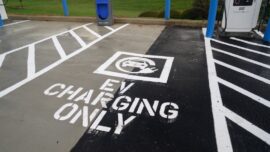
Parking lot striping companies may also recommend striping parking lots with fire lanes marked on the curb. Recently, we’ve had an increase in customers requesting special colors for parking lot striping near pick-up zones, too. When we plan your Richmond parking lot striping project, we’ll include any special areas in the layout.
How Often Should You Update Richmond Virginia Lot Striping?
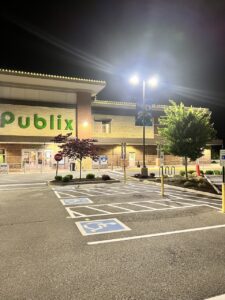
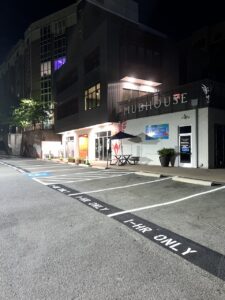
Our company uses high-quality paint and materials to create long-lasting lines when we are striping parking lots. Most striping should last two to three years with normal wear and tear. But, you can also look for signs of visible fading that let you know when it’s time to arrange for striping parking lots. Making sure that Richmond Virginia lot striping is visible at night and from a distance is important for managing traffic flow at all times.
Find Out How to Improve Traffic Flow With Professional Richmond Parking Lot Striping
CVA Striping uses strategic planning to improve traffic flow with parking lot painting. We can begin with a pavement evaluation that includes checking to see if you need to plan for pothole and crack repairs first. Next, we can move on to designing a layout that includes parking lot striping, curb painting, ADA striping, fire lane striping and other pavement markings. Our crew is also adept at installing parking stops and signage for a total safety update. To get a free quote on improving parking lot safety on your property, give us a call at 804-432-3255 or fill out our online form.
 Richmond Pavement Striping – 5 Things Your Probably Didn’t Know