Complete Asphalt Sealcoating Guide: Definitions, Benefits, and Application Techniques

asphalt sealcoating
Table of Contents
Asphalt sealcoating driveways! If you’re a homeowner or property manager looking to maintain your driveway or asphalt surfaces, you’ve come to the right place. In this blog, we’ll break down the complexities of asphalt sealcoating into easy-to-understand terms.  From defining what sealcoating is to exploring its numerous benefits and providing step-by-step application techniques, we’ll cover everything you need to know to ensure the success of your sealcoating projects. Whether you’re new to sealcoating or looking to enhance your knowledge, our guide is here to help you achieve long-lasting results and preserve the integrity of your asphalt surfaces.

Understanding Asphalt Sealcoating

Asphalt sealcoating is a protective process applied to asphalt surfaces to shield them from various damaging elements such as UV rays, water penetration, chemicals, and general wear and tear. This method involves the application of a specialized sealant, typically a coal tar or asphalt-based emulsion, which forms a protective barrier on the surface of the asphalt. By sealing the surface, asphalt sealcoating helps enhance its appearance, extend its lifespan, and reduce the need for costly repairs or replacements.

Pros and Cons of Asphalt Sealcoating

Asphalt sealcoating is a popular method for maintaining and protecting asphalt surfaces. It offers a range of benefits and some potential drawbacks. Understanding these pros and cons can help you decide whether sealcoating is the right choice for your driveway or other asphalt surfaces. Below, we outline the key advantages and disadvantages of asphalt sealcoating.
Pros:
  • Sealcoating gives your driveway a fresh, black appearance, enhancing its look.
  • It protects asphalt from UV rays, water penetration, and harsh chemicals.
  • Sealcoating extends asphalt lifespan, reducing the need for repairs.
  • It is more affordable than repairing or replacing damaged asphalt.
  • Sealcoating smooths the surface and enhances traction, reducing slip risks.
Cons:
  • Requires an initial investment for materials and labor.
  • Needs periodic reapplication, adding to maintenance costs.
  • Must be applied in optimal weather, limiting timing.
  • Surface requires curing time, causing temporary inconvenience.
  • Improper application or low-quality products can result in discoloration.

Asphalt Sealcoating Application Techniques

When considering asphalt sealcoating, it’s important to understand the various application techniques used for sealing asphalt surfaces. Whether you’re planning to sealcoat a parking lot or undertake driveway asphalt sealing, the methods and equipment you choose can greatly impact the effectiveness and longevity of the sealcoat.

Equipment and Tools Required for Sealcoating

Proper asphalt sealcoating requires a range of specialized equipment to ensure a thorough and even application. Here’s a list of essential tools and equipment needed for sealcoating parking lots and driveways:
  1. Sealcoating Machine: This includes both manual and commercial-grade machines designed for large areas like parking lots.
  2. Sealcoat Material: The type and quality of the sealcoating material are crucial for durability and appearance.
  3. Asphalt Sealcoat Sprayer: For an even coat and efficient application.
  4. Squeegees and Brushes: Used for smaller areas and to spread the sealcoat evenly.
  5. Blowers and Sweepers: To clear the asphalt surface of debris before application.
  6. Crack Filling Equipment: Necessary for repairing cracks before applying the sealcoat.
  7. Protective Gear: Includes gloves, goggles, and masks to ensure safety during the application process.

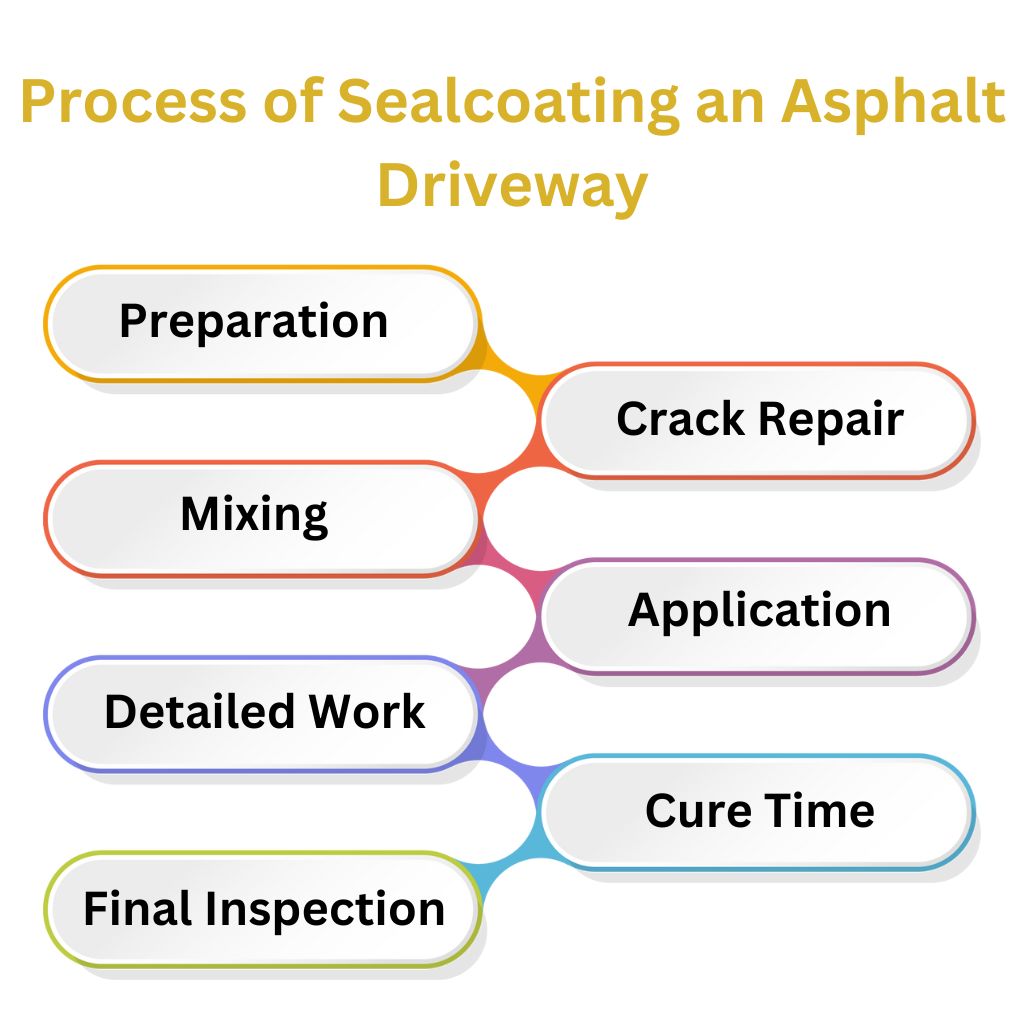
How to Properly Sealcoat an Asphalt Driveway? - Step-by-Step Application Process

Learning how to sealcoat an asphalt driveway involves several important steps. Below is a detailed guide to how to sealcoat driveway surfaces effectively:
  1. Preparation: Start by cleaning the driveway thoroughly. Use a blower or sweeper to remove all debris, dirt, and loose asphalt. This step is crucial to ensure proper adhesion of the sealcoat material.
  2. Crack Repair: Fill any cracks or holes with appropriate crack filling material. This prevents water from seeping through and causing further damage.
  3. Mixing Sealcoat: Prepare the asphalt sealcoating material according to the manufacturer’s instructions. Ensure it is mixed well for an even consistency.
  4. Application:Using a sealcoating machine or sprayer, apply the sealcoat evenly across the driveway. For asphalt sealcoating driveway surfaces, make sure to overlap each pass slightly to avoid streaks and ensure full coverage.
  5. Detail Work: Use brushes or squeegees to apply sealcoat in hard-to-reach areas and edges. This ensures that the entire surface is sealed.
  6. Cure Time: Allow the sealcoat to dry completely. How long does sealcoating take to dry depends on weather conditions, but generally, sealcoat dry time can range from 24 to 48 hours. Ensure the surface is kept clear of traffic and debris during this time.
  7. Final Inspection: After the sealcoat has dried, inspect the surface for any missed spots or areas that need touch-up.
Process of Sealcoating an Asphalt Driveway

The Impact of Timing and Weather on Asphalt Sealcoating

Asphalt sealcoating is highly dependent on weather conditions and timing to ensure a durable and effective seal. Sealcoating should ideally be applied in warm, dry weather with temperatures above 50°F and low humidity levels to speed up drying. The best seasons for sealcoating asphalt are late spring, summer, and early fall. Rain within 24 hours of application can wash away the sealcoat, leading to uneven coverage and potential damage, so it’s important to check the weather forecast. 

Wind can blow debris onto the freshly applied sealcoat, which can cause imperfections in the finish. The sealcoat dry time is typically 24 to 48 hours, but full curing might take up to 72 hours in ideal conditions. Considering these factors can ensure a successful sealcoating application that provides maximum protection and longevity to your asphalt surfaces.

How Long Does it Take to Sealcoat a Driveway?

The entire process typically spans two to three days when planning driveway asphalt sealing. The preparation phase, which includes cleaning the driveway and repairing any cracks, can take a few hours to a full day, depending on the condition of the asphalt. Applying the asphalt sealcoating itself usually takes a few hours, influenced by the size of the driveway and the method used (spraying vs. brushing). The initial drying period is about 24 hours, during which the surface should not be used, while full curing can take 48 to 72 hours, depending on weather conditions. Understanding how long does it take for driveway sealcoating to dry helps in planning and ensuring minimal disruption to your daily routine while achieving the best results for sealing asphalt driveways.

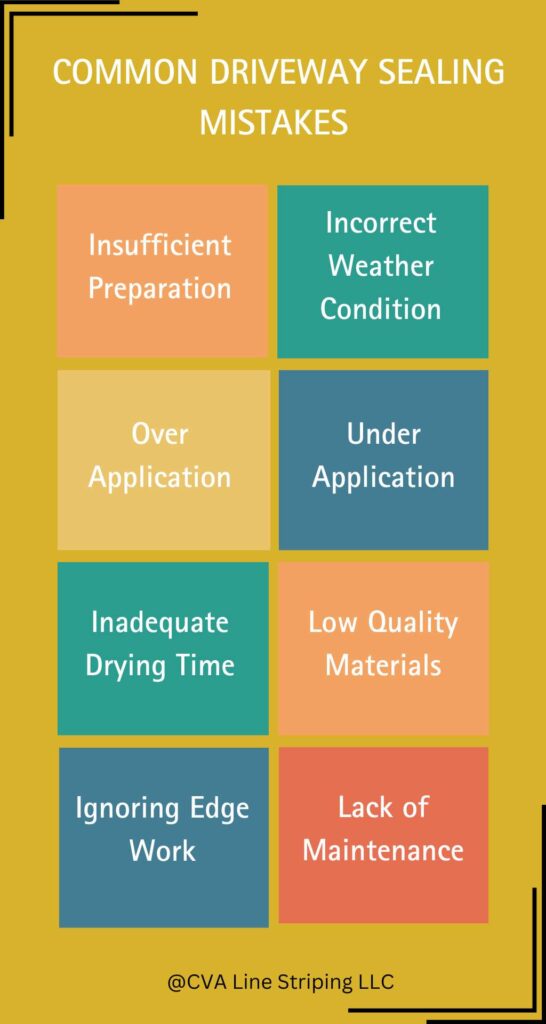
What are the Common Driveway Sealing Mistakes to Avoid?

When undertaking asphalt sealcoating driveway projects, avoiding common mistakes can make the difference between a professional-looking finish and a problematic surface. Here are some pitfalls to watch out for:
  1. Insufficient Preparation: Failing to properly clean and prepare the surface before applying the sealcoat can result in poor adhesion. Always remove all debris and repair cracks prior to sealing.
  2. Incorrect Weather Conditions: Applying a sealcoat in unsuitable weather is a major mistake. Ensure the temperature is above 50°F and no rain is forecasted for at least 24 hours.
  3. Overapplication: Applying too much sealcoat can cause it to crack and peel. Use a consistent and even layer to ensure durability.
  4. Underapplication: Conversely, applying too little sealcoat won’t provide adequate protection. Follow the manufacturer’s guidelines for the correct amount of sealcoat material.
  5. Inadequate Drying Time: Not allowing enough time for the sealcoat to dry can lead to tracking and uneven coverage. Ensure the surface is given sufficient time to cure completely.
  6. Using Low-Quality Materials: Investing in high-quality asphalt sealcoating products ensures better results and longevity. Cheap materials can lead to discoloration and uneven wear.
  7. Ignoring Edge Work: Neglecting the edges and hard-to-reach areas can leave parts of the driveway vulnerable to damage. Use brushes or squeegees for detailed work to ensure full coverage.
  8. Lack of Maintenance: Sealcoating is not a one-time solution. Regular maintenance, including reapplying the sealcoat every 2-3 years, is necessary to maintain the protection and appearance of the asphalt.
Common Driveway Sealing Mistakes

Seal the Deal - Enhance and Protect Your Asphalt for Years to Come

Ready to give your asphalt the protection and enhancement it deserves? At CVA Line Striping, the leading line striping company, we specialize in high-quality asphalt sealcoating that will extend the lifespan of your driveways and parking lots. With our professional-grade materials and state-of-the-art equipment, we ensure a smooth, durable finish that stands up to the elements. Don’t wait until it’s too late—contact CVA Line Striping today to schedule your sealcoating service and keep your asphalt looking great for years to come. Protect your investment and enjoy a pristine, safe surface. Let’s seal the deal!

Asphalt Sealcoating Driveway FAQS

How Much Does It Cost to Top Coat an Asphalt Driveway?
The cost of top coating an asphalt driveway can vary depending on several factors, including the size of the driveway, the type of sealcoat material used, and local labor rates. To ensure you get a fair price and high-quality service, consider getting a few quotes from local line striping companies. For reliable and professional service, reach out to CVA Line Striping.
How Often Should I Seal an Asphalt Driveway?
Sealing asphalt driveways should be done every two to three years to maintain optimal protection and appearance. However, this frequency can vary based on factors such as climate, traffic, and the quality of the previous sealcoat application.
What Are the Negatives About Sealing a Driveway?
While driveway asphalt sealing offers many benefits, there are some drawbacks to consider. First, there is an initial investment required for materials and labor. Additionally, sealcoating needs to be reapplied periodically, adding to long-term maintenance costs. The process is weather-dependent, requiring optimal conditions for application and curing. After sealcoating, the surface needs time to cure before it can be used, which can be inconvenient
What Happens If You Don’t Seal an Asphalt Driveway?
Failing to seal an asphalt driveway can lead to several issues. Without sealcoating, the asphalt is exposed to elements such as UV rays, water, and chemicals, which can cause it to deteriorate more quickly. This can result in cracks, potholes, and a generally worn appearance. Water can seep into the asphalt, leading to freeze-thaw cycles that cause further damage. 
How Long After Sealing the Asphalt Driveway Can You Walk on It?
After sealing the asphalt driveway, it’s recommended to wait at least 24 hours before walking on it to allow the sealcoat to dry properly. For driving and parking, it’s best to wait 48 to 72 hours to ensure the sealcoat is fully cured.
How to Tell If a Driveway Needs to Be Sealed?
There are several indicators that your driveway may need to be sealed. If the surface appears dull or faded, it might be time for a new asphalt sealcoat. Cracks, small potholes, and rough patches are signs that the existing sealcoat has worn off and the asphalt is becoming vulnerable to damage.
How Long Does It Take for Driveway Sealcoating to Dry?
The drying time for driveway sealcoating typically ranges from 24 to 48 hours under ideal weather conditions. Factors such as temperature, humidity, and sunlight exposure can influence the drying process. We recommended avoiding driving on the sealed surface for at least 24 hours to ensure proper curing.

Related Posts

Scroll to Top
Call: (804) 432-3255 Get A Free Estimate